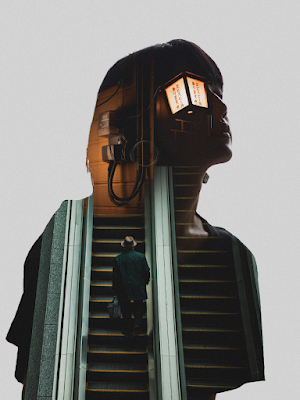
Digital Photography and Imaging/ Exercises
Goh Jia Yih / 0342839 / Bachelor of Mass Communication
(Advertising and Brand Management)
Digital Photography and Imaging
Week 1
Introduction To Digital Photography & Imaging
The importance of Photoshop for the Graphic Designer:
1. Express your creativity
2. Create graphic design
3. Restoration of old images
4. Integrate graphics with text artistically
5. Make use of brushes
6. Change photo color
7. Rectify mistakes in photographs
What Is Digital Imaging?
Digital imaging converts the printed text, artwork, and photographs into digital images using a digital scanner or another imaging device.
Figure 1.0: What Is Digital Imaging?
Top 10 Tips of Successful Graphic Designer :
- Follow The Tutorials
- Experiment
- Memorize All Keyboard Shortcuts
- Try to Replicate Others Work
- Do Participate in Design Competitions
- Subscribe to Online Galleries
- Smart Objects for Smart Designers
- Scaling Artworks and Proportions
- Use Actions to Personalize Work
- Organize the Files Properly
- Bezier Game
It was a lot of fun practising drawing with the pen tool. I learned how to create a straight line with the Shift key and how to change direction while dragging the cursor with the Alt key. I believe I need more practices to control the pen tool smoother.
Figure 1.1: Bezier Game
- List down your 3 favourite graphic design work from Pinterest. Explain why you like the designs?
Design/1
Figure 1.2: Design/1
I like how this collage design uses a similar palette, shapes, and themes (mountains and rivers) to create a sense of cohesion.
Design/2
Figure 1.3: Design/2
What I like about this contemporary surrealist collage art is the bright colour palette and overall harmony. It provides a sensation of calm.
Design/3
Figure 1.4: Design/3
This is a vintage collage of a surprised woman with pink flowers on her face. I love the simplicity of the design and the harmonious color scheme of the collage.
Week 2
Introduction to Photoshop
Lasso Tool
draw & pinpoint specific areas of a document
- Lasso
- Polygonal Lasso
- Magnetic Lasso
Pen Tool
-creating a path from scratch (the fewer points, the smoother a path will be)
-to create extremely precise shapes & paths, using manually placed anchor points
Variation of Pen Tool:
- Straight line paths
- U shaped curves
- Simple S curves
- Complex S curves
Layering
- different images stacked on top of each other
- non-destructive editing
- never destroy the original image
Week 3
Blending Mood
Screen
Black=Transparent / White=Opaque
Figure 1.5: Blending Mood/ Screen
Digital Imaging Exercise 01
Digital Imaging Exercise/ Part 1- Shazam
For this exercise, we were tasked to use Adobe Photoshop to practice various skills such as composing different images into one final out & recolouring images.
Week 4
Digital Imaging Exercise 02
Double Exposure
Figure 2.2: Double Exposure
- Three favourite double exposure design work from Pinterest.
Displacement Map


Comments
Post a Comment